 Word-processing techniques
Word-processing techniques
Word-processing techniques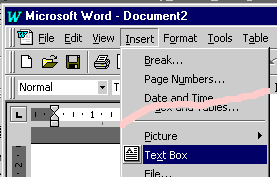 Select Insert
  Text Box.
 .
Click and drag to create a box where you want it to appear.
.
Click and drag to create a box where you want it to appear.
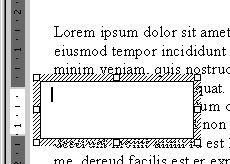 The new box is automatically selected with its eight
handles showing.
Notice that the new box covers up the text behind it.
The new box is automatically selected with its eight
handles showing.
Notice that the new box covers up the text behind it.
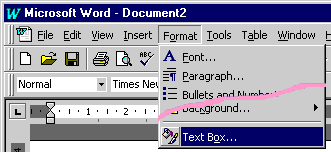 To adjust the size, position and text wrapping of the box,
select Format
Text Box ....
To adjust the size, position and text wrapping of the box,
select Format
Text Box ....
 In the dialogue box,
select the tab and specify the desired
and
for your box, e.g., 5 cm by 5 cm.
In the dialogue box,
select the tab and specify the desired
and
for your box, e.g., 5 cm by 5 cm.
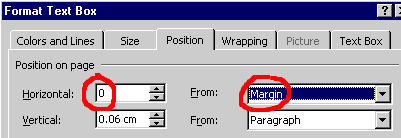 Select the tab and specify
the desired position, e.g., 0 cm from the left margin.
Select the tab and specify
the desired position, e.g., 0 cm from the left margin.
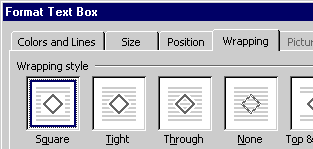 To wrap the text around the box, rather than hiding it
behind the box,
select the tab and specify
the desired style, e.g., wrapping.
To wrap the text around the box, rather than hiding it
behind the box,
select the tab and specify
the desired style, e.g., wrapping.

Last substantive modifications 2002 Mar 16
Last modified: Tue, 2007 Mar 6 20:32:02
Slide show generated from wp-tech.html by Weasel 2007 Mar 7